
A Condensed Build Guide to building your own AR-15 Rifle by Wesley Hurd, Copyright 2016
AR-15s are very easy to build and most of the parts can be legally purchased online and shipped directly to your front door. Here are some popular sites that offer sales and have good products:
- https://www.palmettostatearmory.com/
- http://www.aimsurplus.com/
- http://www.primaryarms.com/
- http://www.brownells.com/
- http://www.midwayusa.com/
Table of Contents
- About this Guide
- Mil Spec vs. Commercial
- The Upper
- The Lower
- Magazines
- Assembly
- Accessories
- Easy Shopping List #1
- For your Upper:
- Upper Alternative — buy a complete upper:
- For your Lower
- Lower Alternative — buy a complete lower:
- When to Buy
About this Guide
The objective of this guide is to introduce prospective builders to the parts, nomenclature, cost, and considerations involved in building an AR-15 rifle. This guide breaks the AR-15 down into its two main components, the “upper” and the “lower.” Pertinent information is then presented about each sub-assembly or component so that the builder can understand what parts they should order from the various retailers. A further aid is provided to new builders in that each component is listed with a cost estimate that reflects “mil spec” quality components in today’s market.
By coupling this guide with the myriad of YouTube videos which show how to assemble AR-15 rifles, any intelligent person can safely put together an AR-15 in their own garage in a few hours.
Mil Spec vs. Commercial
Mil Spec refers to AR-15 parts that are manufactured to the military specifications. Some mil spec parts do not interface with commercial parts. The main concern is making sure that everything fits. By and large, most things you get in mil spec are great. Sometimes a mil spec isn’t so great and you want commercial. Sometimes things are produced as commercial spec to improve on milspec, other times parts are produced to a commercial spec as a cost saving move. As a general rule in the AR-15 building world mil spec is best when it comes to how your upper receiver and lower receiver are milled on the inside and for your buffer tube. This leads to most of your other major components ending up being milspec as well. So, as a general rule I prefer to stick with milspec components unless I know exactly why I’m going commercial.
The Upper
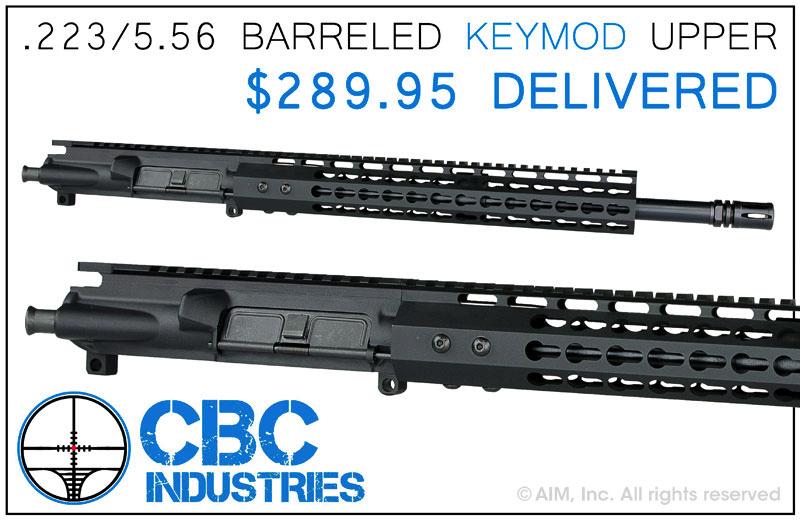
(The one pictured does not include the Bolt Carrier Group, Charging Handle, or sights. This is typical of complete upper sales. This one can be purchased from aimsurplus.com at the time of writing this document)
The Upper refers to the complete rifle assembly that attaches to the lower assembly. It includes all the parts we’re about to go over below.
Calibers: Uppers (and lowers) can be caliber specific especially when it comes to the bolt and barrel. The most popular caliber for an AR-15 is 5.56×45(nato)/.223. When people refer to “The AR-15” they are almost always referring to the rifle chambered in 5.56×45/.223.
A note about 5.56×45, .223 Remington, and .223 Wylde cartridges: Essentially all 3 of these cartridges are dimensionally identical (nit-picks aside), any one of these 3 cartridges will readily chamber in a barrel designated any of aforementioned calibers. The distinction that matters is the pressure the different cartridges loadouts exert on the barrel and chamber. 5.56×45 is typically a higher pressure load than .223 Remington (though not always) which means a barrel rated only for .223 may experience catastrophic failures or greater wear and tear at the throat and muzzle when 5.56 rounds are used. Barrels designed for 5.56×45 will have no difficulty handling the typical .223 pressures. .223 Wylde was designed in part to provide a barrel that would gracefully handle high and low pressure rounds.
Others Calibers Include: .22lr, 300 blackout, 7.62×38, .454 Socom, 6.8 SPC, .50 Beowulf and pistol calibers such as .45, .40, 9mm, 10mm. All of these require barrels in the correct caliber, some of these can use the same mags and bolt carrier groups, some of these require lower mag well inserts (pistol calibers to accept pistol mags), and others require bolt carrier modification which is usually as simple as installing a different bolt into the BCG.
Upper Receiver
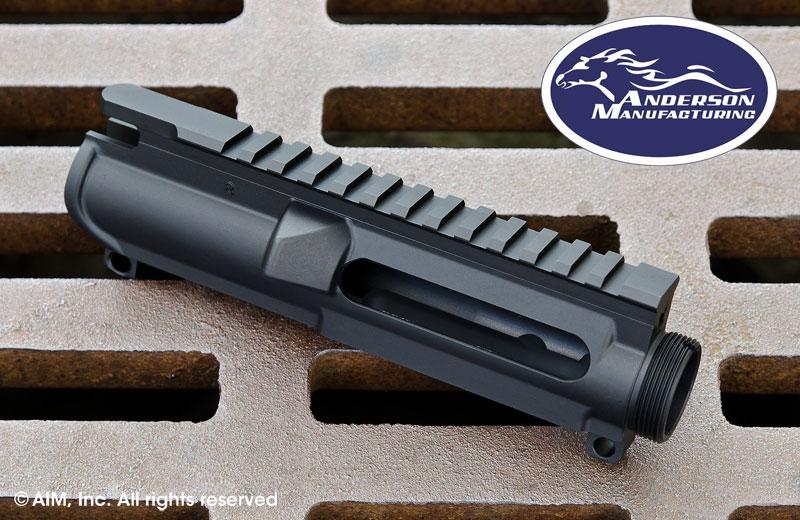

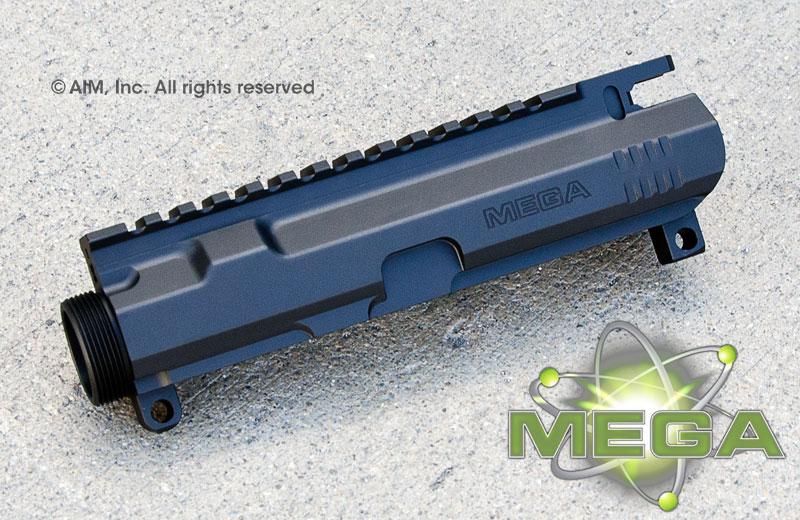
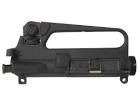
The four stripped receives above represent 4 different styles of upper receivers. The first one is the most common, it’s an A3 upper receiver that accepts a dust cover and the forward assist and has a flat top rail. Most people buy uppers with flat top rails, but older style A2 receivers with the monolithically integrated carry handle can still be purchased. If you like the carry handle it might be better to buy a flat top receiver and then purchase a detachable carry handle to install, it looks practically the same and functions exactly the same while providing flexibility for down the road.
Aluminum Types: Upper receivers are typically forged from or milled out of 7075-T6 (aircraft grade) aluminum. Though some can be purchased in 6065 aluminum. 7075-T6 is always going to be more durable than 6065 or other grades of aluminum. The reason 6065 is used sometimes is because it is easier to machine than 7075.
Upper Parts Kit
Entire upper parts kits can be purchased. They consist of at least the Ejection Port/Dust Cover Assembly and Forward Assist Assembly listed below. They may sometimes include a barrel nut assembly which you may or may not use depending on the type of handguard/rail you select.
Ejection Port/Dust Cover Assembly ($5.99)

The dust cover can be closed to prevent dust from getting into the chamber and fire control area when the rifle is being carried or stored. The dust cover automatically flips open when the Bolt Carrier Group cycles.
Forward Assist Assembly ($12.99)
The Forward Assist allows the Bolt to be helped “into battery” without tools. It was introduced to help recover from jams where loose debris might be obstructing the chamber.
Are the Dust Cover and Forward Assist Required?
The answer is no, you can purchase an upper receiver that does not accept a dust cover or a forwards assist. However, in my opinion, an AR-15 that does not have a dust cover or forward assist enters into the sporting category and leaves the battle rifle category without these battle ready features.
Bolt Carrier Group (BCG) ($79.00 +)
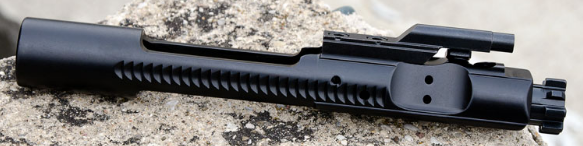
Entire Bolt Carrier Groups (BCG) can be purchased in varying styles, and finishes. The cheaper they are the less likely they are to have fancy finishes that “self lubricate” or are more wear resistant. Standard military rifles do not utilize BCGs with these fancy finishes so you really don’t need anything other than a standard milspec BCG to produce a completely reliable firearm.
Bolt
Most people will not buy bolts separate from the BCG but they can be purchased especially as a replacement part if the one you have breaks or wears out or if you want to switch calibers.
The bolt is comprised of several important parts, specifically 3 gas rings, the ejector and extractor.
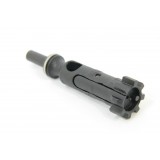
Bolt Carrier
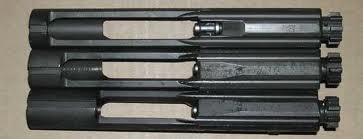
Bolt carriers came in several different styles. The most common these days is called a “Full Auto Bolt Carrier” which means that it has more metal at the end to theoretically trip an auto-sear once the bolt has returned to battery. The bottom one in the image is a full auto bolt carrier. In spite of the fact that these are referred to as “Full Auto” they will not convert your rifle to fully automatic and are perfectly legal in a semi-auto rifle.
Firing Pin
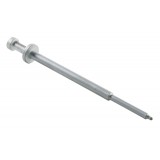
When building a rifle you typically buy the entire BCG which comes with a firing pin already installed but these are easily purchased apart from the BCG and can have additional features to improve reliability and performance. Firing pins that are slightly longer than milspec are often used to help mitigate light primer strikes.
BCG Materials Quality: Bolts, and bolt carriers can be machined out of different quality steel. You’ll want your bolt to be made of tool steel (typically 9310 Tool Steel) or better and for your carrier you’ll want 8620 steel or better.
Charging Handle ($19.99 +)
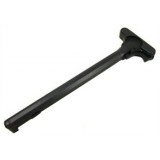
The Charging handle fits into the back of the upper receiver and then the BCG is slid in holding the charging handle captive. Once in place the charging handle engages the bolt to charge the weapon. Pictured above is the most basic aluminum charging handle. Many manufacturers produce charging handles that feature larger knurled grips, and ambidextrous catch releases.
Barrel ($79+)

Barrels can be purchased in different calibers, lengths and profiles and with different ends (threaded or crowned).
Barrel length is important. Unless you register your rifle as a Short Barrel Rifle (SBR) and pay the $200 tax stamp, all rifle builds must have a barrel length of 16 inches or more (There are other caveats but this is the most basic rule). You can build an AR with a barrel under this length that is not an SBR and doesn’t require any ATF paperwork but it will technically be a pistol and cannot have a stock or a vertical fore-grip (unless the overall length (OAL) is greater than 26″, read up on this one to be sure you’re compliant).
Twist Rate determines how many inches the bullet travels before the rifling rotates the bullet one whole rotation. Typical rotations are 1/7, 1/8 and 1/9 meaning that the bullet makes one rotation in 7, 8, or 9 inches of travel. The most common rotation is 1 in 7. The reason for different twists is that different twists can stabilize different grain weight bullets better. While 1/7 is most popular it was developed for typical 5.56 mil spec loads and doesn’t stabilize some .223 loads as well. Because of this, 1/8 twist rate is a good middle ground for both calibers and it is gaining popularity. Barrels with a 1/8 twist are usually those chambered in .223 Wylde.
Feed Ramps
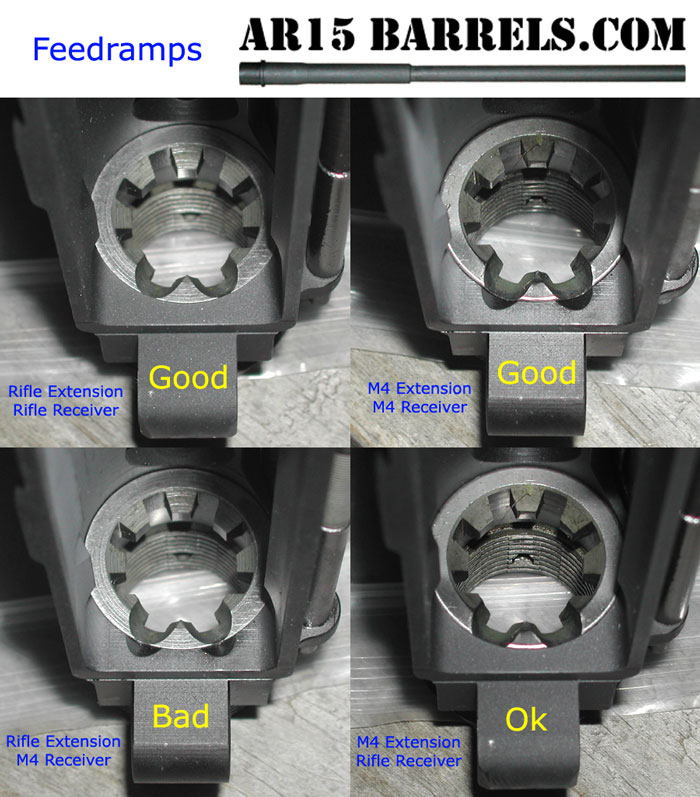
(For the purpose of this article we’ll assume that you, like 99% of other AR barrel buyers, will be receiving a barrel with a “barrel extension” all but permanently installed.)
The barrel extension sets the chamber headspacing and should come properly headspaced from the factory (though many people advise getting your own “go”, “no go” gauges and checking yourself, or having a gunsmith check it….I’ve never had a problem, though I’ve heard of it happening).
The most important thing you want to pay attention to on your barrel extension is if the feed ramps match the upper receiver. You’ll want to make sure that your barrel extension has M4 feed ramps. Most of them do, but it’s good to be aware that if your upper receiver and your barrel don’t have matching feed ramps you can have feeding issues. See the image above for reference.
Chamber Type is another thing to look out for in barrels is that 5.56/.223 barrels can be chambered in 5.56×45 (abbreviated 5.56), .223, and .223 Wylde. The difference between 5.56 and the .223s is negligible even though this can be a subject of hot debates. .223 Wylde is typically thought of as a more precision chambered barrel with the chamber tolerances being specific to the .223 Wylde and known to easily handle 5.56 (1/7) and .223 pressures and it typically comes with a 1/8 twist barrel which is a good middle ground between 5.56 chamberings and .223 chamberings (1/9).
Contour is what defines the outside shape of the barrel and may also determine what length gas tube you need. Rifle length barrels (18”+ inches usually) require a rifle length gas tube, carbine length barrels require carbine length (mid length) gas tubes. Contour also makes a difference in barrel weight, a heavy barrel may be more accurate but you have to lug around a weighty rifle, a pencil profile barrel will be lighter. Most basic consumer AR-15s are fitted with a military or M4 contour barrel.
Threads are put on the end of most barrels and for the 5.56/.223 caliber they’re typically 1/2inch by 28 threads per inch (½-28). While it is possible to purchase barrels without threaded ends, they aren’t sold often, and they’re typically only desirable for meeting specific state compliance standards (California for example.)
Barrel Materials and Quality: Barrel quality can be guaranteed with some testing such as Magnetic Particle Testing though not all barrels get this. You at least want to make sure that your barrel is made from 4150 Steel or better, MP testing is recommended. The rule for barrels is that the more money you spend, the better your barrel, however, with even the cheapest barrels capable of handling 5,000 or more rounds before accuracy is affected and the ease of barrel replacement, an argument can be made for treating cheap barrels as a consumable item in a rifle intended for training.
Barrel Linings: Often barrel interiors are lined with either chrome or nitrite, the purpose being to extend the life of the barrel. For most shooters this is irrelevant as the lifespan of a standard barrel is easily more than 5000 rounds, however sometimes a barrel comes along that is lined that’s just the right price and you may say “why not”. If accuracy is a concern, nitrite may actually be more inherently accurate than a chrome lined barrel. Nitrite is applied via a chemical process that does not change the diameter of the materiales being treated, whereas chrome is applied via an electro-plating process. The argument is that chrome plating may change the dimensions of the barrel nonuniformly, theoretically reducing accuracy, but you should only worry about this if you plan on shooting past 600yds.
Barrel Nut Assembly
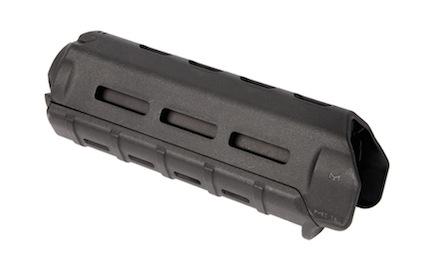
Depending on what kind of rail or handguard you intend to install you may or may not need one of these. If you’re installing traditional plastic handguards like the first and second pictures below then you’ll need a barrel nut assembly and you’ll need to make sure you have the right kind of gas block/sight tower as well (covered under Gas Block).
Rail/Handguard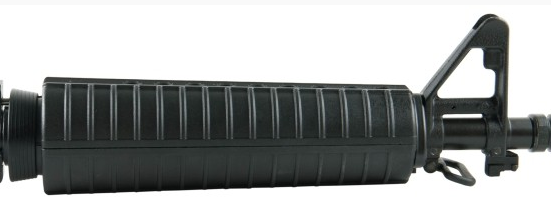
Hand guards come in many shapes, styles and types and offer many different features. They can also be one of the single most expensive components you’ll buy but they can change the look and functionality of your rifle immediately.
A2 Style Handguards Mount between a standard A2 barrel nut assembly that has a spring loaded retaining ring and your gas block. Once your Barrel Nut Assembly and your Gas Block are installed they are very easy to remove and replace. But because they attach in the middle of your barrel accuracy can be reduced as it leads to outside forces being able to act on the barrel with handling, that being said, the Marines have no problem hitting targets at 300yds and further with non-free-floating rails.
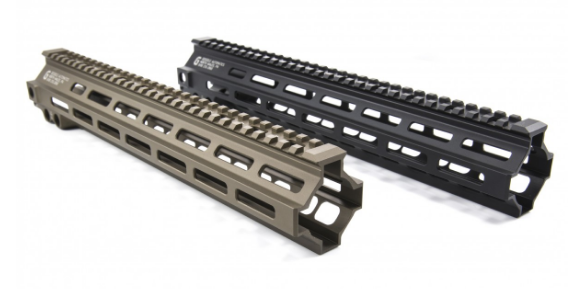
Free Floating Handguards typically ship with brand proprietary barrel mounting hardware that allow the rail to interface with the barrel only at the point where the barrel attaches to the upper receiver. These are more accurate because they don’t put any strain on the barrel. They are typically made of aluminum and come with various mounting systems. The two rails shown last are Geissele Free Floating Rails with the M-Lok mounting system and they run about $275. They come with an extremely rugged proprietary mounting system.
Mounting Considerations: If you’re planning on going with a free floating rail system and accuriziation is a concern for you, lapping and bedding the mating surface between your upper receiver and barrel extension is advisable, this requires more specialized tools, but they are available, there are plenty of YouTube videos if you want to learn more.
Rail Mounting Systems allow for mounting of sights and accessories. Most rails incorporate at least a picatinny top rail that allows for mounting of sights. Most sights and optics are designed or have mounting options for this. Other mounting systems are geared more towards accessories, the two more popular ones are Keymod and M-Lok. There are also proprietary mounting systems that make their way onto cheaper rails.
Gas Block
Gas blocks slide onto the barrel and are attached over a gas port hole that comes drilled into the barrel. They direct gas from the barrel into a tube that causes the bolt to cycle.
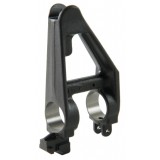
The standard A2 Gas block (pictured top left) has an integrated sight tower and is very recognizable for its “M-16” look and most have a bayonet lug on the front and a bracket for a sling swivel. The downside to these is that the front site is hard to change and can’t be folded down.
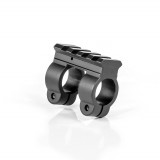
There are gas blocks that have picatinny rails on top for the purpose of mounting different style sights. They come in two heights: rail height which is taller and requires rail height sights. And Gas block height (pictured top right) which are shorter and require taller gas block height sights. Most people only purchase these if 1) they want to use A2 handguards or 2) they like the look and know the parts to pull it off.
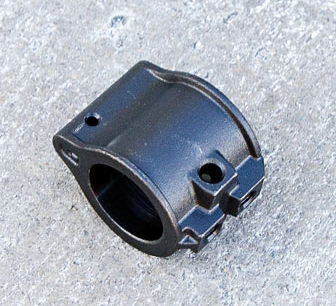
Low Profile Gas Blocks (pictured bottom left) are designed to go under a free floating rail. Also, you should make sure that your rail is long enough to cover your gas block or it’ll look weird and you’ll be made fun of.
Gas Tube ($12.99)

The gas tube is pinned into the gas block, it runs along the top of the barrel and into the upper receiver where it interfaces with the “gas key” on top of the Bolt Carrier. When a bullet is fired some of the pressure behind the bullet travels from the barrel, through the gas block, through the gas tube into the Bolt Carrier and cycles the Bolt Carrier Group.
Gas tubes come in three typical sizes, mid/carbine length, rifle length, and pistol length. You purchase the tube that is right for your barrel. Most 12”-16” barrels use mid/carbine length gas tubes.
The AR-15 is considered a Direct Gas Impingement (DI) system because of this gas tube design. There are other gas systems that work like the AK-47 gas system called “piston” systems that can be installed on the AR platform but they generally require modifications (or complete replacement) of the bolt carrier and are much more expensive.
Front/Rear Sights (~$30 + each)
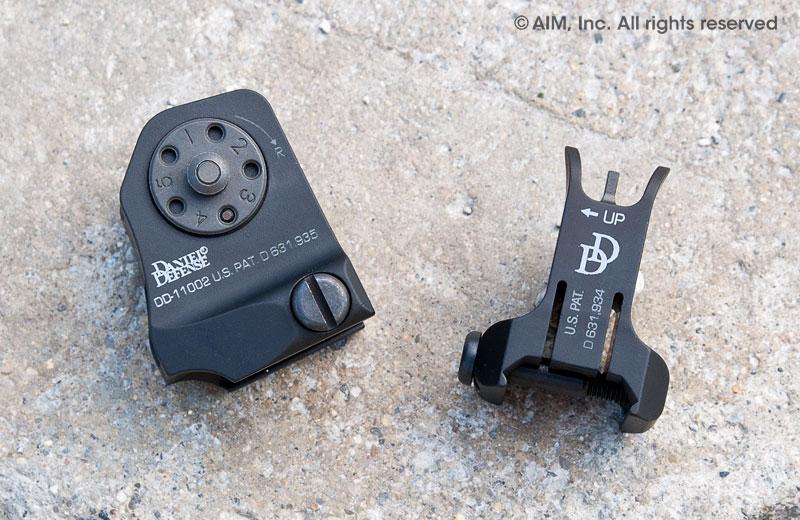
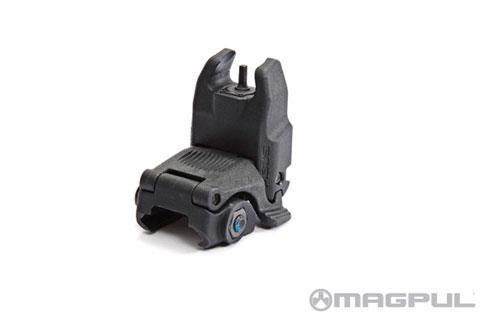
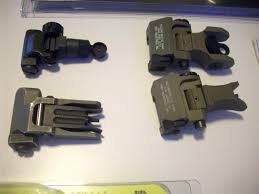
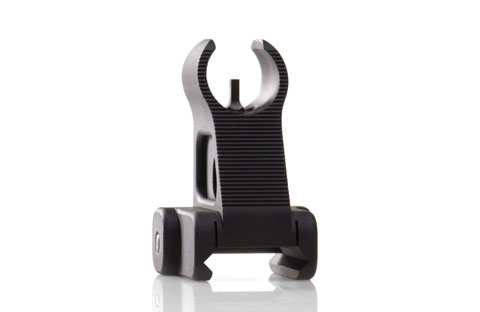
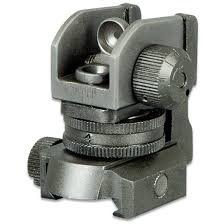
Front sights can have several features. They can be folded or fixed typically. The front sight is usually where elevation is changed when zeroing your rifle.
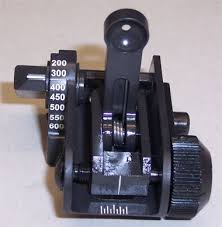
Rear sights can be folding or fixed and can have field-adjustable elevation settings for shooting to different ranges.
Low profile, flip up sights are typically what are used when you plan on mounting an optic. If you plan on only using irons then you should purchase either fixed sights or heavy duty flip up sights that lock into place (Troy for example) you don’t want those folding down on you in a critical situation.
Muzzle Devices – Flash Suppressors / Muzzle Brakes
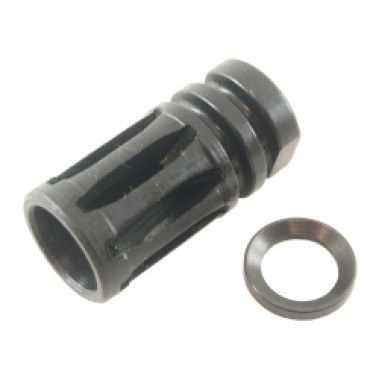
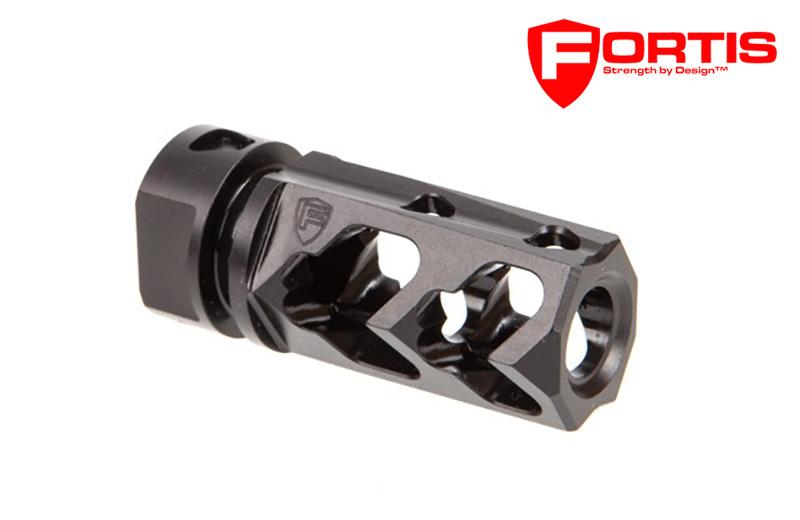
Muzzle devices come in one of two main categories (excluding the sound suppressor category): Flash Suppressors / Hiders or Muzzle Brakes or muzzle devices that attempt to straddle the brake/flash suppressor divide. Muzzle devices for the 5.56/.223 caliber are typically threaded with ½-28 threads. The most common muzzle device is the standard A2 “Birdcage” flash suppressor shown on the left, it does an OK job of suppressing the flash.
Flash Suppressors are designed to reduce the intensity of flames that are produced with the point being to maintain low light visibility with being blinded by the flash or giving away one’s position. There are other people out there who love to use devices that increase the flash because it looks cool on camera.
Muzzle Brakes are designed to port gasses upwards and backwards to counteract the recoil of the rifle and provide quicker target re-acquisition.
Crush Washers may be used to provide tension behind the muzzle device when tightening. In the case of the above A2 birdcage you would use a crush washer and index the bird cage so that the ports are pointed upwards. Crush washers are usually one-time use. Other muzzle devices may come with a nut to back onto the device and allow for precise indexing and security. A third type of washer that may be used is a peel washer that allows paper thin pieces of itself to be removed allowing for precise indexing and tightening of muzzle devices.
The Lower
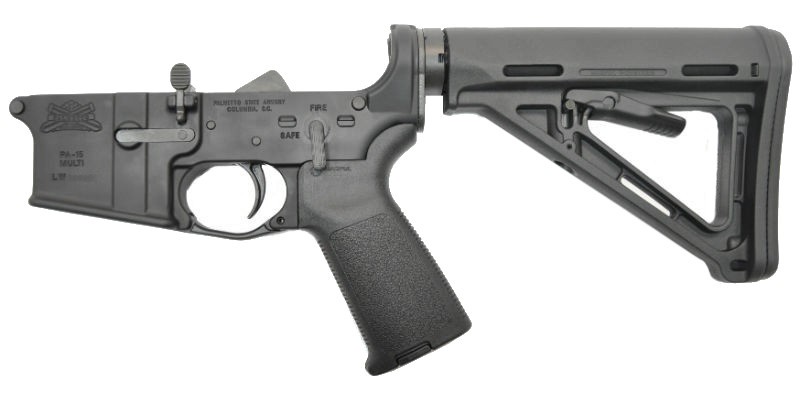
Pictured above is a Complete Lower (pre-assembled) that can be purchased for about $169.00. Because the lower is complete it must be shipped to your local FFL dealer and then transferred to you (typically for a fee). The alternative to a complete lower as shown above is to assemble your own “custom” lower with components of your choice.
The Lower Receiver
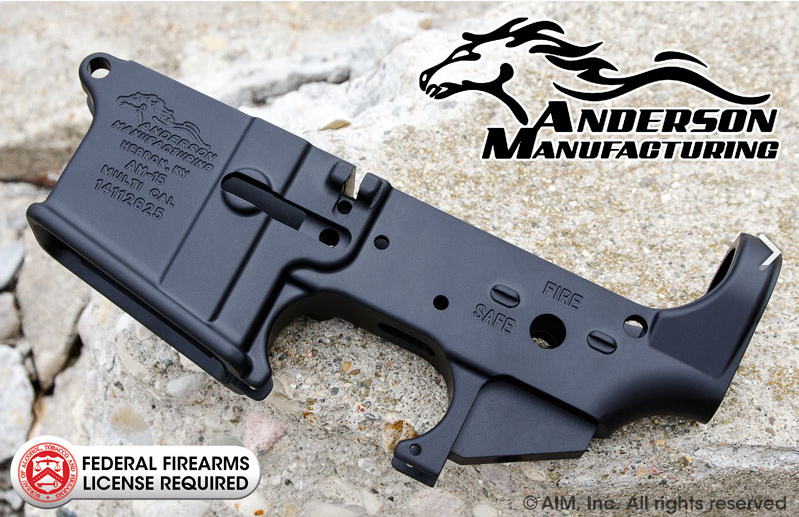
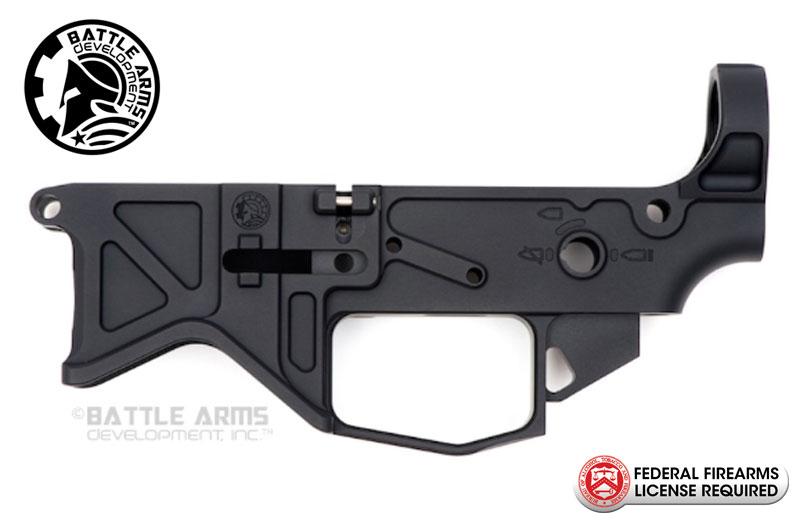
Completed Lower Receivers are the only parts that can’t be shipped directly to your door in its completed form. The top two receivers have all of the milling operations required to be completed. These must be shipped to your local FFL dealer and transferred to you after a background check. The top one is a forged lower and this is the most common and best priced type. The bottom one is a billet milled lower. Both are equally strong but the billet ones are usually fancier looking and typically much more expensive.
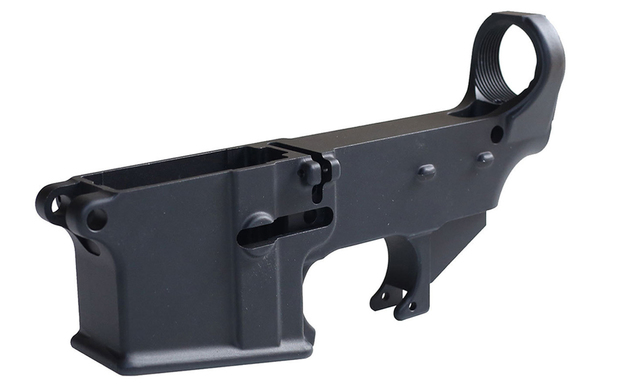
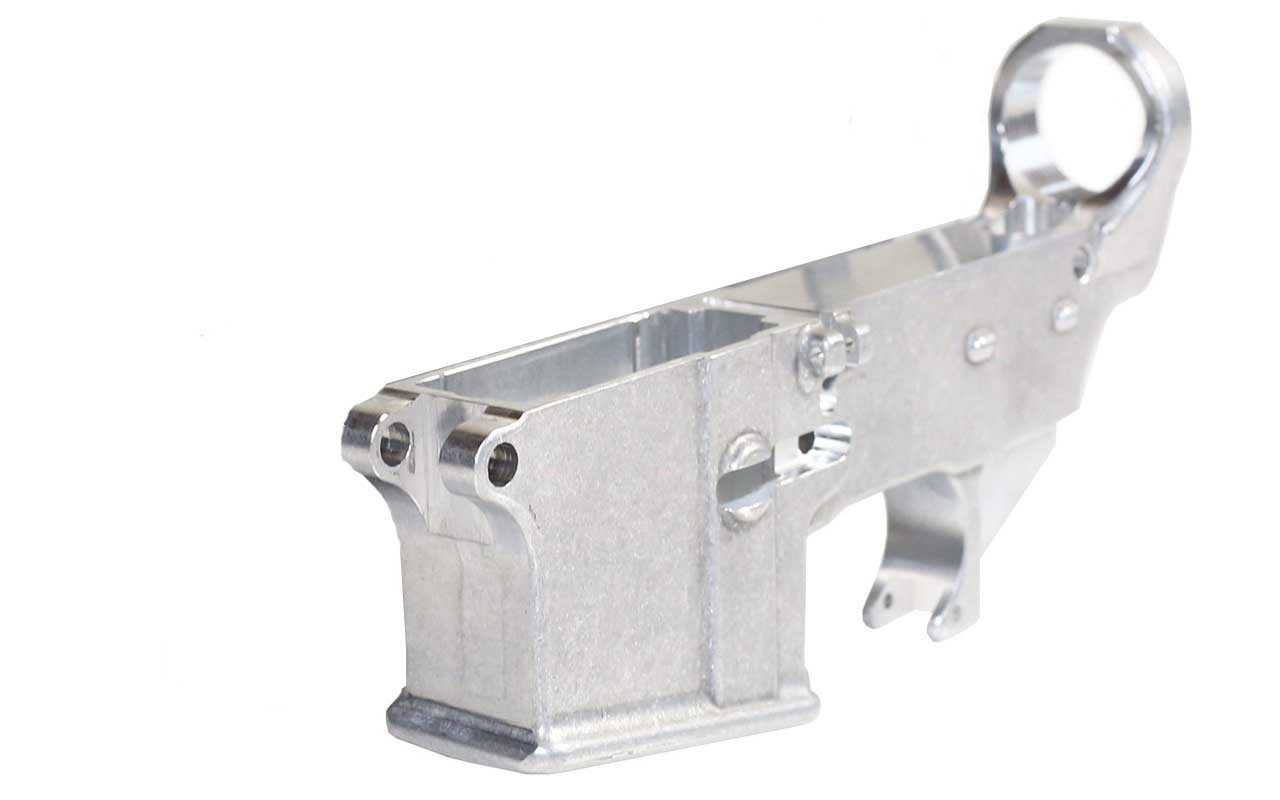
80% Lower Receivers (as depicted in the bottom two images) require the fire-control area to be milled out and the trigger, hammer, and safety holes to be drilled. You can ship these directly to your door and you yourself can complete the last 20% of the machining operations required to allow these to function. No background check is required, but they require special tools and jigs to complete.
Polymer and Polymer Hybrid Lower Receivers are being offered because of their cost effectiveness, ease of manufacturing and their light weight. Some come with metal reinforcements in known stress points. While the durability of polymer lowers has increased as the technology has been improved they are known to break under stress therefore I wouldn’t use one on a battle rifle. Additionally, at this time the price of polymer lowers aren’t much less than an Anderson 7075-T6 aluminum lower.
Lower Parts Kit
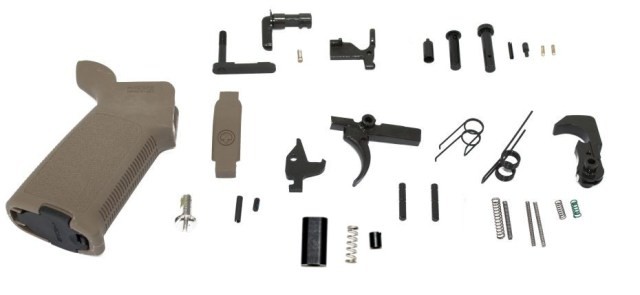
The lower parts kit (LPK) includes all of the internal parts for your lower to make it functional except for any of the buffer tube and stock pieces. Some of the parts kits come with a nice Magpul grip and trigger guard. Because you can buy these parts separately I’ll list them below as well.
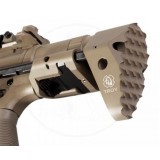
Grip
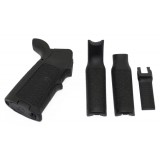
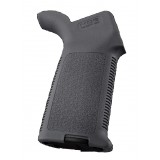
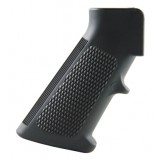
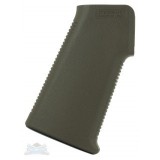
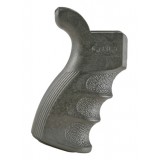
There are many different style and color of grips. Some are rubberized some have better textures and some have different angles. Reduced angle grips are really in right now (top middle), and are designed to make modern stances naturally comfortable.
Fire Control Group

The Fire Control Group (FCG) consists of the trigger and spring, the hammer and spring, the disconnect and spring and two pivot pins. The typical Milspec FCG is called a single stage trigger and can be pretty gritty and is what ships in standard LPKs. Geissele, CMC, Timney and others sell enhanced triggers with the prices starting at about $150 and going all the way to about $400. A $230 2-stage trigger can greatly enhance your accuracy (reduces human error) and pleasure if you want to spend the money.
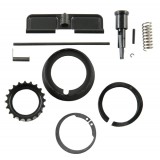
Takedown Pins / Springs / Detents / Safety / Magazine Release / Bolt Catch
All of these parts are shipped with the standard LPK but can be purchased separately. Extended takedown pins can be nice. Ambidextrous safeties might be good for lefties as well as Ambi mag releases. Or maybe you just want a style that’s different from the standard milspec look.
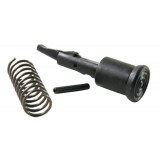
Buffer Tube Assembly ($39 +)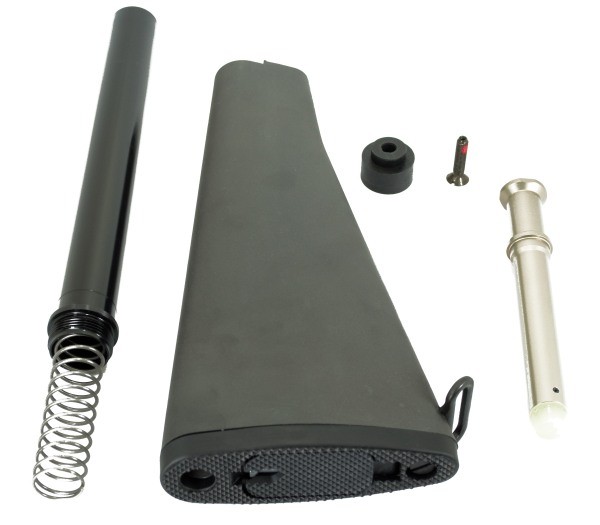
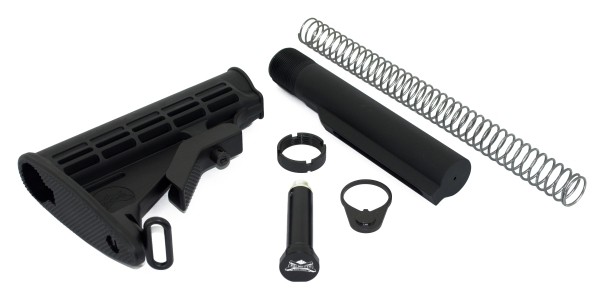
A milspec buffer tube assembly can be purchased in a kit with a standard milspec stock as pictured above. It comes with a 6-position buffer tube, buffer, buffer spring, end plate, and castle nut and the stock slides over the back of the buffer tube the buffer and spring live inside the buffer tube–the spring goes in first and is held captive by the buffer detent.
There are two styles of stock: the adjustable stocks and then the old A2 style rifle stocks. All the parts are almost completely different between the two styles so know what you want.
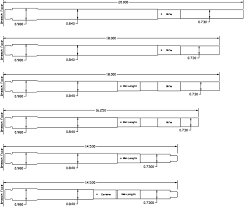
Buffer Tube

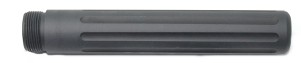
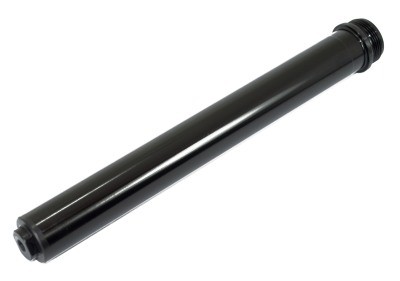
Buffer tubes come in 3 different types. Top: 6 position buffer tube that allows different types of stocks to be easily installed, in most cases without tools. Middle: a pistol buffer tube which does not allow a stock to be installed at all. Bottom: a rifle tube that allows a fixed rifle stock to be installed.
Buffer tubes screw into the threads on the lower receiver and in the case of the 6-position buffer tube are tightened into place by a receiver plate and a castle nut.
Receiver End Plate

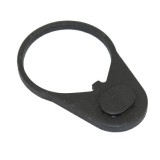
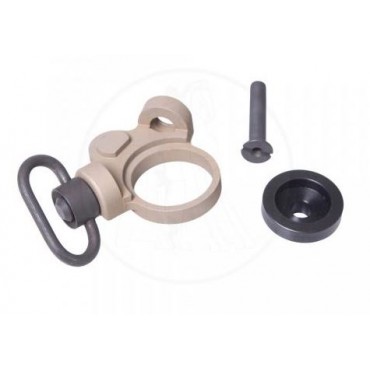
Endplates keep the buffer tube indexed (so they don’t twist) and hold in the rear takedown pin detent spring, they are held in by the castle nut. They can also be purchased with different mount points. QD mount points pictured above on photo 1 and 3. The plate pictured in the middle is what typically ships with your buffer assembly kit.
Buffer Tube Castle Nut

The castle nut is threaded onto the buffer tube before it is screwed into the lower receiver. Then the receiver plate is installed. Once the buffer tube has been positioned the castle nut is backed against the receiver plate and tightened with an armorer’s wrench. The smaller cuts should point towards the receiver so that they can be staked into place to prevent loosening. The castle nut pictured is what typically ships with your buffer assembly kit.
Buffer
The buffer fits inside the buffer tube in front of the spring and is held captive in the buffer tube by the buffer detent. The buffer is filled with loose weights that dampen the impulse of the Bolt Carrier Group as it reciprocates. Different weight buffers can be purchased to help handle different barrel pressures. But just the basic buffer is more than adequate for your typical carbine. The standard buffer is what typically ships with your standard buffer assembly kit.
Buffer Spring ($2.99)
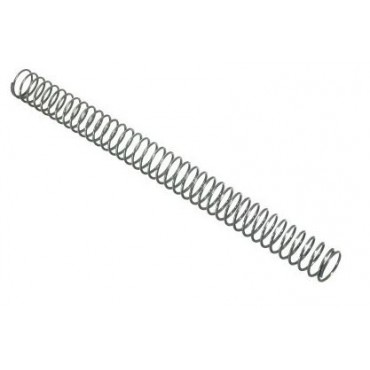
The buffer spring slides into the buffer and then is held captive by the buffer. Special springs and spring alternatives can be purchased such as pistons, but the one that ships with your standard buffer assembly kit is usually all you’ll ever need or want.
Butt Stock ($19.00 +)
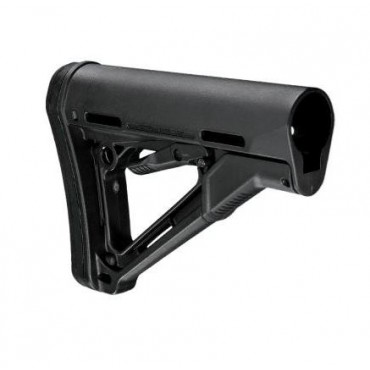
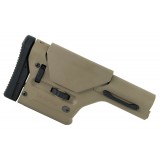
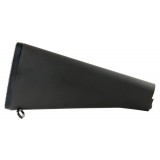
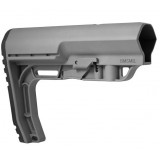
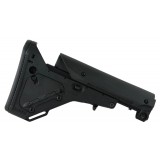
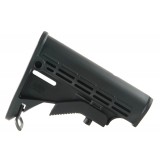
Stocks come in all different shapes, sizes and prices. Some of the stocks pictured even require special bolt carrier groups (PDR stock), some require fixed rifle tube assemblies, but most adjustable stocks will fit on your standard mil spec 6-position buffer tube.
Magazines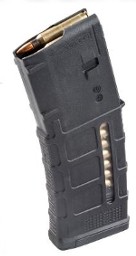
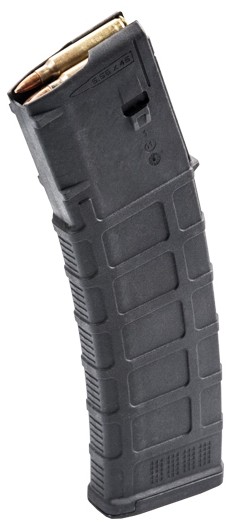
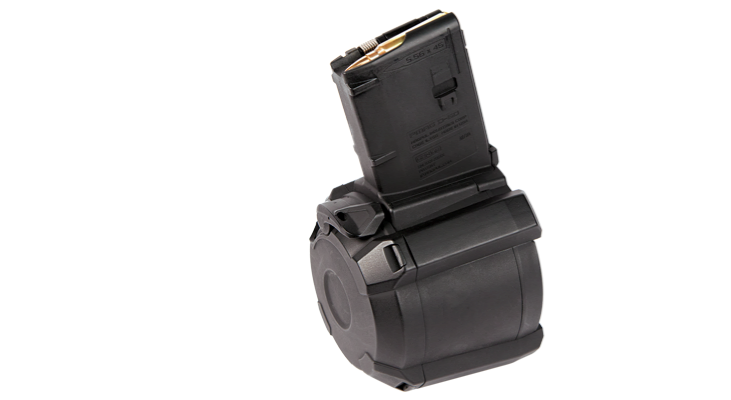

There are lots of companies making magazines and they all have their pros and cons. Magpul is the biggest seller of polymer mags which are very popular. They sell 10, 20, 30, 40 round mags and a 60 round drum mag. Because their feed lips are polymer if kept loaded for years they can eventually spread and fail to feed.
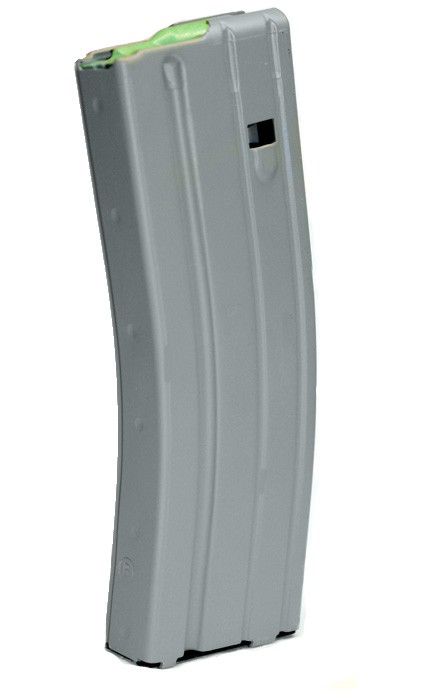
Lancer mags (the clear mag pictured) is polymer but has steel feed lips integrated so they don’t spread over time. They’re a little more expensive but people love them.
Steel GI mags are probably the most ubiquitous magazine out there and they either come with the standard GI green follower that is OK or they come with after-market followers such as Magpul’s enhanced anti-tilt follower. You can usually pick up deals on GI mags with magpul followers for about $8.99/each if you watch the sales.
Remember, magazines are consumable so you should keep about at least 10 around.
Assembly
There is only one specialty tool required when assembling your AR-15:
Tools
AR-15 Armorer’s Tool ($15)
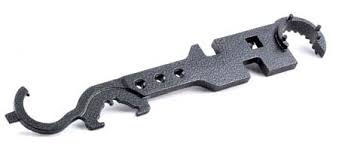
The armorer’s tool is used for tightening the castle buffer tube and castle nut, installing the A2 flash hider (and other compatible muzzle devices), the standard barrel nut. It interfaces with a torque wrench.
Barrel Nuts are usually installed with a torque wrench so it’s good to have one on hand.
A small hammer, flat head screwdriver and some punches help in the installation of your pins.
The AR-15 can be installed without any specialty tools but they sure do help.
Loctite
In situations where screws or bolts are used (gas blocks, sights, rails, optic mounts, etc.) it’s advisable to use Loctite Threadlocker Blue 242 to prevent the screws from loosening when in use.
Accessories
I may write about accessories but it’s a HUGE area. So if you want to do your own research you can look into these areas.
Foregrips
Optics
Sling Mounts
Bipids
Light Mounts